
Fireplace mantels have come a long way. They were initially developed to help frame the opening of a fireplace and serve as a hood that prevents smoke from entering the room. Today, they also serve a decorative purpose. A unique mantel can make your wood or gas fireplace a stunning focal point in your living room. The mantel can be used as a shelf to place accessories that add character to the space. Mantels only serve a decorative purpose in fireplaces where modern heating methods are used. If you’re thinking of upgrading your fireplace mantel, we’ll share some DIY tips in this article to make the process fun and simple. Go over these unique fireplace mantels ideas to add ornamental and artistic features to your room or house.
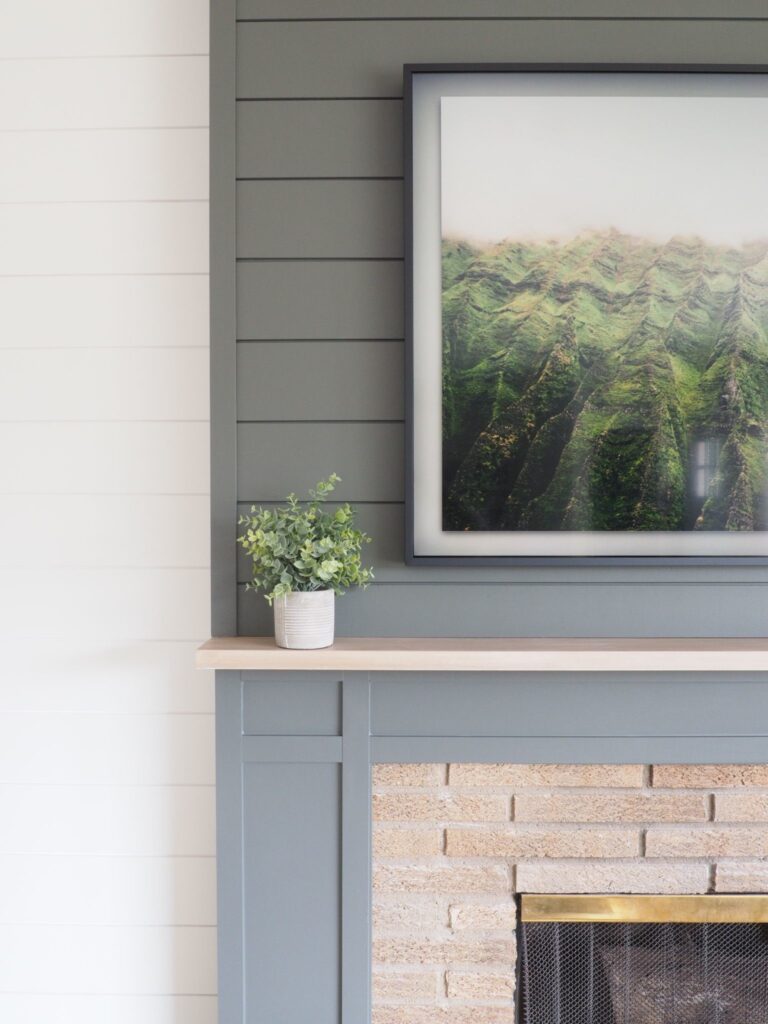
Floating mantel
Simply put, a floating mantel can be a simple frame of wood or any other material installed over the fireplace and appears to be floating on the wall. Adding a simple floating mantel is a quick way to give your fireplace an uplift without spending too much. These mantels are such a trendy feature even in homes without a fireplace as they offer an elegant and minimalistic style many homeowners are after these days. The best part is, even the greenest DIY warrior can hack the process of installing a floating fireplace mantel. This is one of the projects that you will be able to take on and find yourself being converted into a DIY fanatic.
Step by step guide to installing a floating mantel
Step 1: Pick the ideal material & supplies
The easiest pick for a DIY installation is wood. Reclaimed wood is usually one of the best options as it has the appearance of solid wood but is lightweight and easier to handle than actual solid wood. You can find good quality wood beams at the local stores. You’ll also need a tape measure, pencil, screws, and electric drill to get the job done.
Step 2: Identify where to hang the mantel
Next, mark the section where you intend to hang the floating mantel. If you had an existing mantel and you’d like to replace it with a new one, identifying the location would be easy. We recommend hanging it between 54” and 64” above the floor for a completely new floating mantel, depending on your ceiling height. Just mark the section with a pencil and then attach a ledger board on the wall with screws. To give the ledger board a firm grip, you can attach two anchors underneath in between the bricks and then attach the board onto the anchors.
Step 3: Build the actual mantelpiece
Simply put, your mantelpiece should look like a box that’s missing one side. This means that you’ll need three wood planks to build your mantel. We recommend a basic whiteboard for a simple and affordable look. You can use a nail gun to glue and nail the pieces together and make them secure.
Step 4: Sand your mantelpiece
You can now do the rest of the finishing, such as sanding to smoothen the edges and corners, before installing it on the wall. Consider adding some character to the wood by staining it. For a more traditional look, consider going for a darker walnut stain, mahogany, or cherry.
Step 5: Hang the mantel
Once done, you can hang the mantel on the ledger boards by slipping it over the supports, then make it more secure with screws. Stick to the markings you had made earlier to ensure you get the desired placement when mounting it.
Wood Mantel 2 Hours DIY
Looking for a simple way to add some charm and rustic vibe to your fireplace? Consider adding a wood beam mantel. Wood beam mantels are such an amazing addition to any room. We’ll show you how to build a fireplace mantel with a DIY makeover that will take only about 2 hours to complete.
Step by step guide
Let’s first go over the basic things you’ll need to start your makeover:
- Common boards (you can measure the ideal size you need depending on your unit and the area you want to be covered. Typical board sizes are 6”x10” for a standard fireplace)
- Trigger clamps: We recommend the 3/4” size because they are stronger, durable and make your DIY task a lot easier.
- Finish nailers: You can choose between the 15 gauge or 16-gauge nailers, depending on the nails you have. 16-gauge nails are usually more versatile as you can shoot nails thinner and work well for different projects.
- Circular saw: We recommend using a cordless model that’s perfect for the DIYer. It gets tasks done quicker.
- Wood stain: You can go for any option depending on the style you want to achieve. The popular wood stains include dark walnut, ebony, chestnut, cherry, and mahogany.
- Foam brush and rag for applying the stain
With these items ready, follow the steps below to build your wood beam mantel.
Step 1: If you already have an existing mantel, use a circular saw to cut the common board the length of the mantel.
Step 2: Take another common board and cut it the same length as the initial one. This will form the face board of the mantel. For this particular board, you may want to add an extra 1.5”. This allowance ensures that the seams can be hidden from the front of the mantel for a neater look.
Step 3: Now cut the side pieces. The width should fit the mantel width, but you can add an extra 0.75” height in order to hide the seam from the side.
Step 4: Use your trigger clamps to clamp the top board to the mantel. This will ensure it doesn’t move as you nail the sideboards.
Step 5: Start nailing the side pieces together. Use 16 finish nails if you have a nail gun. Once both side pieces are in place, you can go ahead and nail the face board.
Step 6: Sand and then stain your wood beam to give it an ultimate look.
Typically, this project will require a very small investment in terms of time and money. You can get more ideas on how to decorate a fireplace mantel and give it that extra touch that makes your room feel so much cozier.
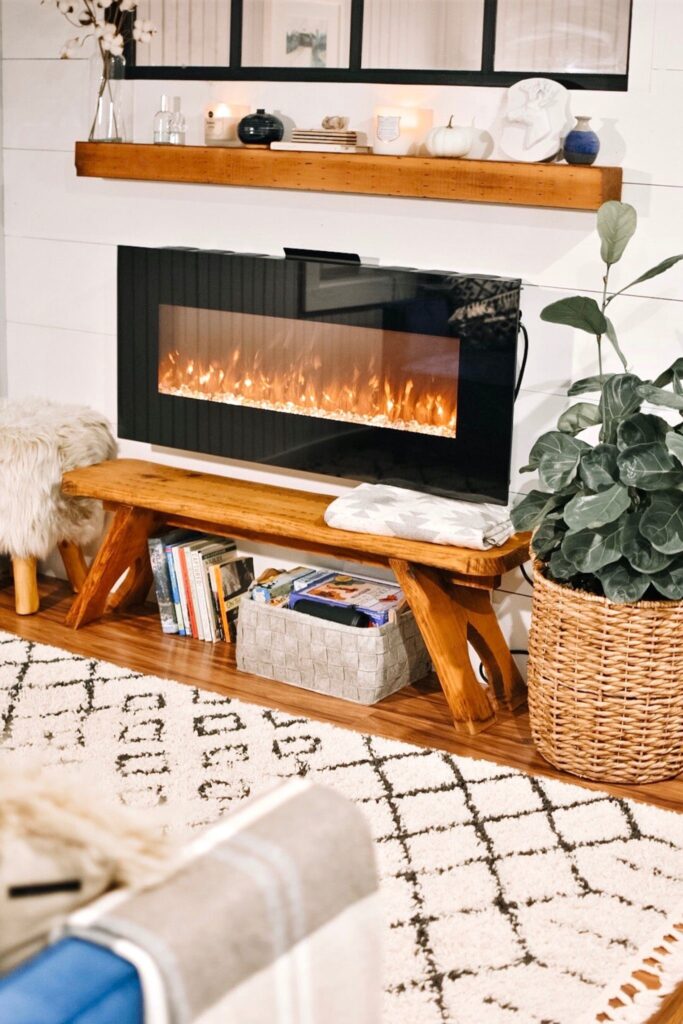
Quick mantel makeover
One of the main challenges in living rooms with a large fireplace is finding a suitable spot to place the TV. If your living room is small, you might want to place your TV on the mantel, depending on its size. If the mantel is too narrow, you can transform it quickly to ensure your TV set fits comfortably in the space. This is one of those quick DIY projects that almost anyone can handle.
Step by step guide
With a solid piece of reclaimed wood, you can build a simple mantel that’s wider and longer to fit your TV set. Assuming you just want to preserve the look of the fireplace and keep it simple, this project will take just a few hours to complete. When picking your reclaimed wood, choose one that’s thick, wide, and long enough to fit the TV set. We recommend getting new wood that’s going to match your style and structural needs.
Pick wood that’s already cut to size, so you don’t have to spend time sawing it to fit your existing space. The next step would be to attach the reclaimed wood piece to the existing mantel using some screws. The final step is to caulk, prime and paint the wood to blend with the rest of the mantel.
The finished mantel will not only fit your TV perfectly but also complement the rest of your home. When you have a small house with limited space, having the TV sitting on the fireplace is a good space-saving idea.
A few more words
Creating a mantel of your dreams doesn’t have to cost you a lot of time and money. Whether you already have a fireplace or not, a mantel can give you extra space to decorate your room and even create a faux fireplace. If you need help choosing a fireplace, accessories, or tools, visit our fireplace store.